Unlocking the Secret to the Most Delicious Homemade Falafel: Fried, Baked, & Crispy
There's nothing quite like the irresistible aroma and satisfying crunch of perfectly made falafel. This beloved Middle Eastern staple, typically made from ground chickpeas and a vibrant mix of herbs and spices, is a culinary delight that transcends cultures. While often enjoyed from street vendors, mastering a truly delicious homemade falafel recipe fried or baked is entirely achievable, promising fresh, crispy, and flavorful results that will rival your favorite takeout.
Forget the myth that homemade falafel is complicated. With a few key techniques and the right ingredients, you can whip up batches of these golden-brown beauties in your own kitchen. Whether you crave the classic, deep-fried crunch or prefer a lighter, baked version, this comprehensive guide will equip you with all the knowledge to create falafel that's crispy on the outside, tender on the inside, and bursting with authentic flavor.
The Foundation of Flavor: Essential Ingredients & Preparation
The magic of falafel begins with its humble yet mighty ingredients. The quality and preparation of each component are crucial for achieving that authentic taste and texture.
- Dried Chickpeas – The Non-Negotiable Core: This is perhaps the most important tip: do not use canned chickpeas! Dried chickpeas, soaked overnight, are essential for the proper texture and flavor profile. Canned chickpeas are pre-cooked and too soft, leading to a mushy falafel that won't hold its shape or crisp up properly. Soak one cup of dried chickpeas for at least 8 to 12 hours, ensuring they are covered with plenty of water as they will triple in size. After soaking, drain and rinse them thoroughly.
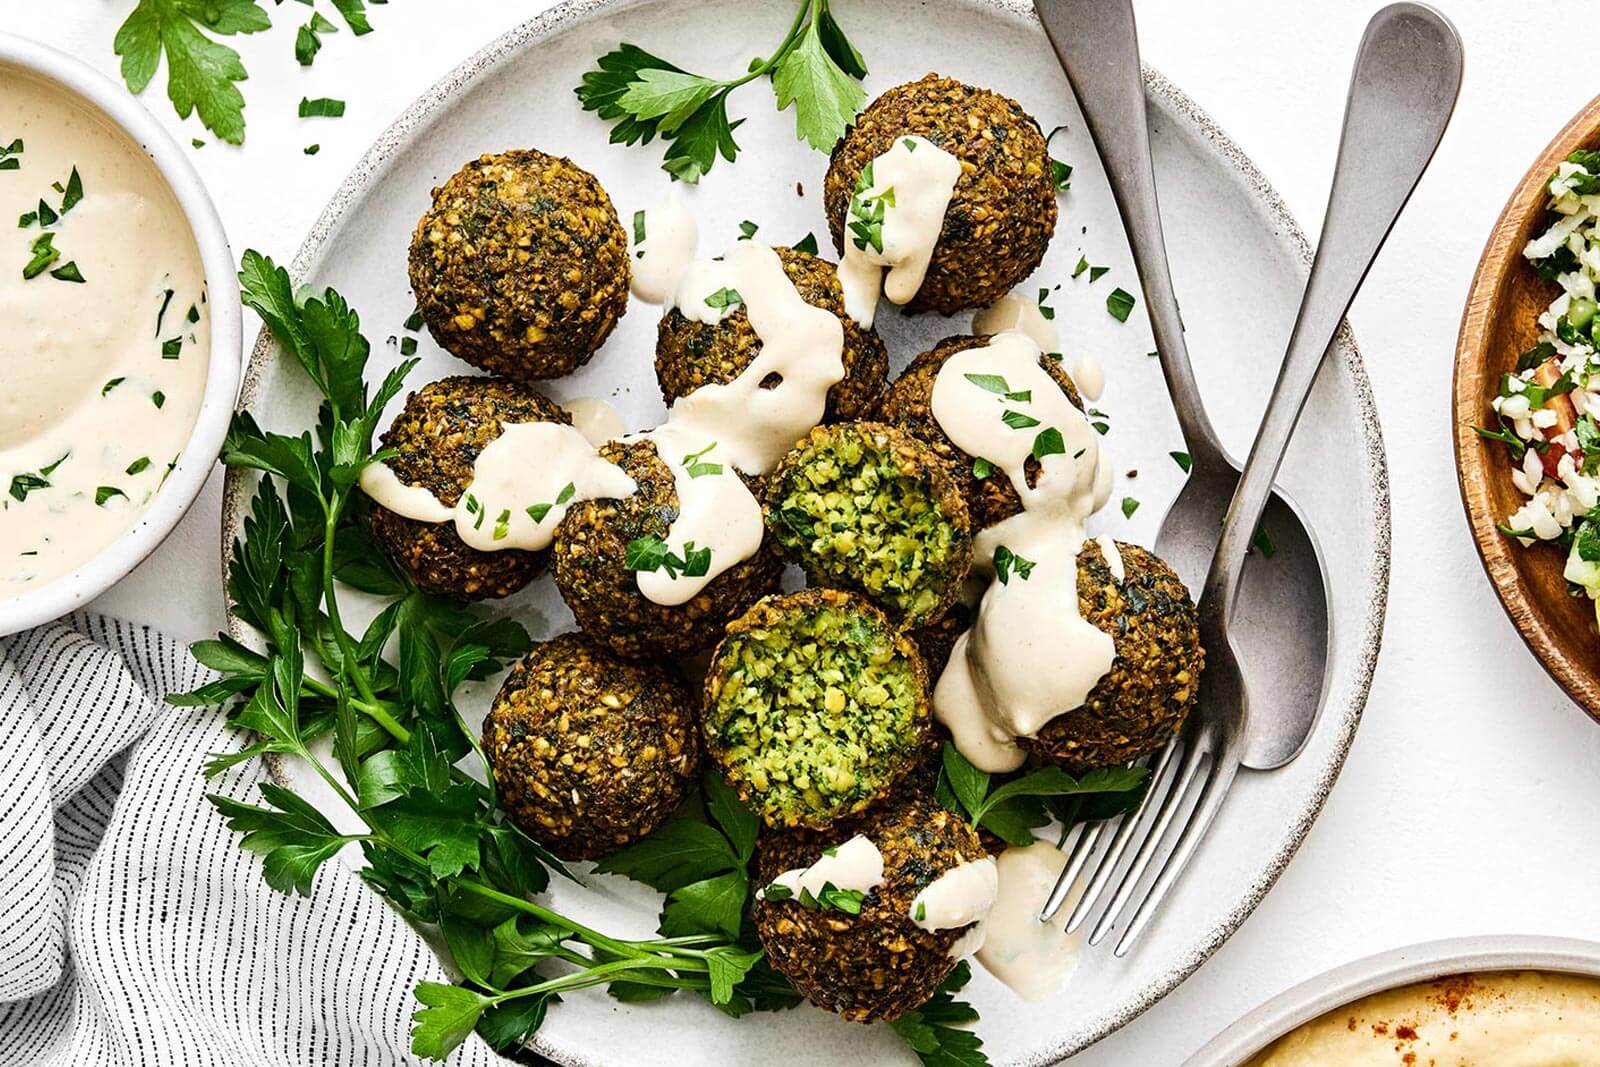
- Aromatic Powerhouse: Fresh Herbs, Onion, Garlic & Chile: These ingredients are what give falafel its signature vibrant green hue and incredible depth of flavor. You'll need generous amounts of fresh parsley and cilantro (about one large bunch of each), roughly chopped. A roughly chopped onion, a few cloves of garlic, and a small green chile pepper (like serrano or jalapeño) add a wonderful aromatic kick. Adjust the chile quantity to your preference for heat.
- The Spice Blend: Warming & Earthy: Cumin is the dominant spice, providing that characteristic earthy warmth. Complement it with salt, a touch of aromatic cardamom, and a pinch of black pepper. These spices are balanced to enhance the chickpeas and herbs without overpowering them.
- Binding and Leavening Agents: Two tablespoons of chickpea flour (or another suitable flour) act as a binder, helping the falafel hold its shape. A half teaspoon of baking soda is a clever addition that contributes to the falafel's light, airy interior and desirable crispiness, especially when fried.
Crafting the Perfect Falafel Mixture: Texture is Key
The success of your falafel hinges significantly on the consistency of your mixture. It's a delicate balance that requires a food processor and a watchful eye.
- Pulse, Don't Blend: Combine the soaked and drained chickpeas, roughly chopped onion, parsley, cilantro, garlic, green pepper, and all the spices into your food processor. The key here is to pulse, not continuously blend. You want a coarse, gritty texture that resembles sand, not a smooth paste. Over-processing will result in dense, heavy falafel that lacks that characteristic crumbly-tender interior. Stop and scrape down the sides as needed, pulsing until no large pieces remain but the mixture still has visible texture.
- Chill for Stability: Transfer the falafel mixture to a bowl and gently stir in the chickpea flour and baking soda. Cover the bowl and refrigerate for at least 30 minutes to an hour. This chilling period is crucial; it allows the flavors to meld, the flour to absorb moisture, and the mixture to firm up, making it much easier to shape and preventing it from falling apart during cooking.
- Adjusting Consistency – Troubleshooting 101: Even with careful preparation, mixtures can vary. If your falafel mixture feels too wet and sticky after chilling, add another tablespoon of chickpea flour, one at a time, until it reaches a manageable consistency. If it's too dry and crumbly, preventing it from holding its shape, add a teaspoon or two of water or lemon juice until it binds together better. The ideal consistency should be firm enough to shape without crumbling, but not sticky.
- Shape Them Up: You can shape your falafel into traditional small balls (about 1-1.5 inches in diameter) or flatter patties. Use your hands, a small ice cream scoop, or a dedicated falafel scoop for uniform shapes. Press them firmly but gently to ensure they hold together.
Fried vs. Baked: Achieving Ultimate Crispy Falafel
Now for the main event: cooking your falafel. Both frying and baking offer distinct advantages and can produce wonderfully crispy results when done correctly.
The Classic Deep-Fried Method: Unmatched Crispiness
For that authentic, golden-brown exterior and incredibly satisfying crunch, deep-frying is the traditional choice.
- Oil Preparation: Choose a neutral oil with a high smoke point, such as vegetable, canola, or sunflower oil. Add about 3 inches of oil to a deep pot or Dutch oven. Heat the oil over medium heat to 350°F (175°C). Using a thermometer is highly recommended to maintain the correct temperature; too cool, and your falafel will be greasy; too hot, and it will burn on the outside before cooking through.
- Batch Cooking: Carefully lower 6 to 8 falafel into the hot oil using a slotted spoon or spider. Do not overcrowd the pot, as this will lower the oil temperature and lead to uneven cooking.
- Fry to Golden Perfection: Cook the falafel for 1 to 2 minutes per side, or until they are a rich golden brown and crispy all over. Use a skimmer or tongs to gently turn them.
- Drain and Serve: Once perfectly colored, remove the falafel and transfer them to a paper towel-lined plate to drain any excess oil. Serve immediately while hot and at their crispiest. For a deeper dive into this comparison, check out our guide on Baked vs Fried Falafel: Get Crispy, Authentic Flavor at Home.
The Healthier Baked Method: Crispy, Not Greasy
If you're looking for a lighter option without sacrificing crispiness, baked falafel is a fantastic choice. Your house won't smell of fried food for days, and they contain significantly less fat.
- Preheat and Prepare: Preheat your oven to a hot 400-425°F (200-220°C). Line a baking sheet with parchment paper and lightly brush or spray it with oil. A thin layer of oil is key to helping them crisp up.
- Arrange and Bake: Place the shaped falafel on the prepared baking sheet, ensuring they are not touching. Bake for 20-30 minutes, flipping them halfway through.
- Golden & Crispy: They should be golden brown and firm to the touch. Baking times can vary depending on your oven and the size of your falafel, so keep an eye on them. You might even consider a brief broil at the very end to enhance crispiness, but watch them closely to prevent burning. Discover more specific tips in our Crispy Baked Falafel Recipe: Less Fat, Incredible Flavor.
- Serve Warm: While baked falafel retains its crispness longer than fried, it's still best enjoyed warm from the oven.
Tips for Success & Creative Servings
Troubleshooting Common Falafel Fails:
- Falafel Falling Apart: This usually means your mixture is too wet. Add another tablespoon of chickpea flour and re-chill the mixture. Ensure your chickpeas were well-drained after soaking.
- Not Crispy Enough:
- For Fried: Your oil temperature might be too low, leading to greasy, soft falafel. Ensure it's consistently at 350°F (175°C). Don't overcrowd the pot.
- For Baked: Ensure your oven is hot enough, and don't skimp on the light oiling of the baking sheet or the falafel themselves. Flipping them halfway helps.
- Charred Outside, Raw Inside: This indicates your oil is too hot (for frying) or your oven temperature is too high (for baking). Reduce the heat and cook for longer at a moderate temperature.
Meal Prep Like a Pro:
Falafel is fantastic for meal prepping! You have a few options:
- Freeze the Dough: Make the falafel mixture according to the instructions, then freeze it in an airtight container for up to 3 months. Thaw it in the refrigerator overnight, stir, adjust consistency if needed, then shape and cook.
- Freeze Raw Shaped Falafel: Form your falafel balls or patties, then arrange them on a baking sheet and freeze until solid. Once frozen, transfer them to a freezer-safe bag or container. You can then fry or bake them straight from frozen, adding a few extra minutes to the cooking time.
Beyond the Pita: Creative Serving Suggestions:
While the classic pita sandwich with tahini sauce, hummus, and fresh veggies (lettuce, tomatoes, cucumbers, pickles) is unbeatable, falafel is incredibly versatile:
- Falafel Bowls: Serve over a bed of quinoa or rice with roasted vegetables, a dollop of yogurt-cucumber dip, and a sprinkle of fresh herbs.
- Salad Topper: Crumble or slice falafel into a vibrant Mediterranean salad for a hearty, protein-packed meal.
- Mezze Platter Star: Arrange falafel with other dips like baba ghanoush, olives, fresh bread, and crudités for an impressive appetizer spread.
- Breakfast Treat: Yes, seriously! Try falafel alongside scrambled eggs and a fresh tomato salad.
And don't forget the tahini sauce! A simple homemade tahini sauce can be made by whisking together tahini, fresh lemon juice, minced garlic, a splash of water (to thin to desired consistency), and a pinch of salt. It's the perfect creamy counterpoint to crispy falafel.
Embrace Your Inner Falafel Chef!
Making homemade falafel, whether you choose to fry them for that undeniable classic crisp or bake them for a lighter, healthier twist, is a deeply rewarding culinary experience. By focusing on fresh ingredients, understanding the importance of mixture texture, and mastering your chosen cooking method, you'll produce consistently delicious and perfectly crispy falafel. So gather your ingredients, fire up your food processor, and prepare to delight your taste buds with the most authentic and satisfying homemade falafel you've ever had!
